

Fermentation
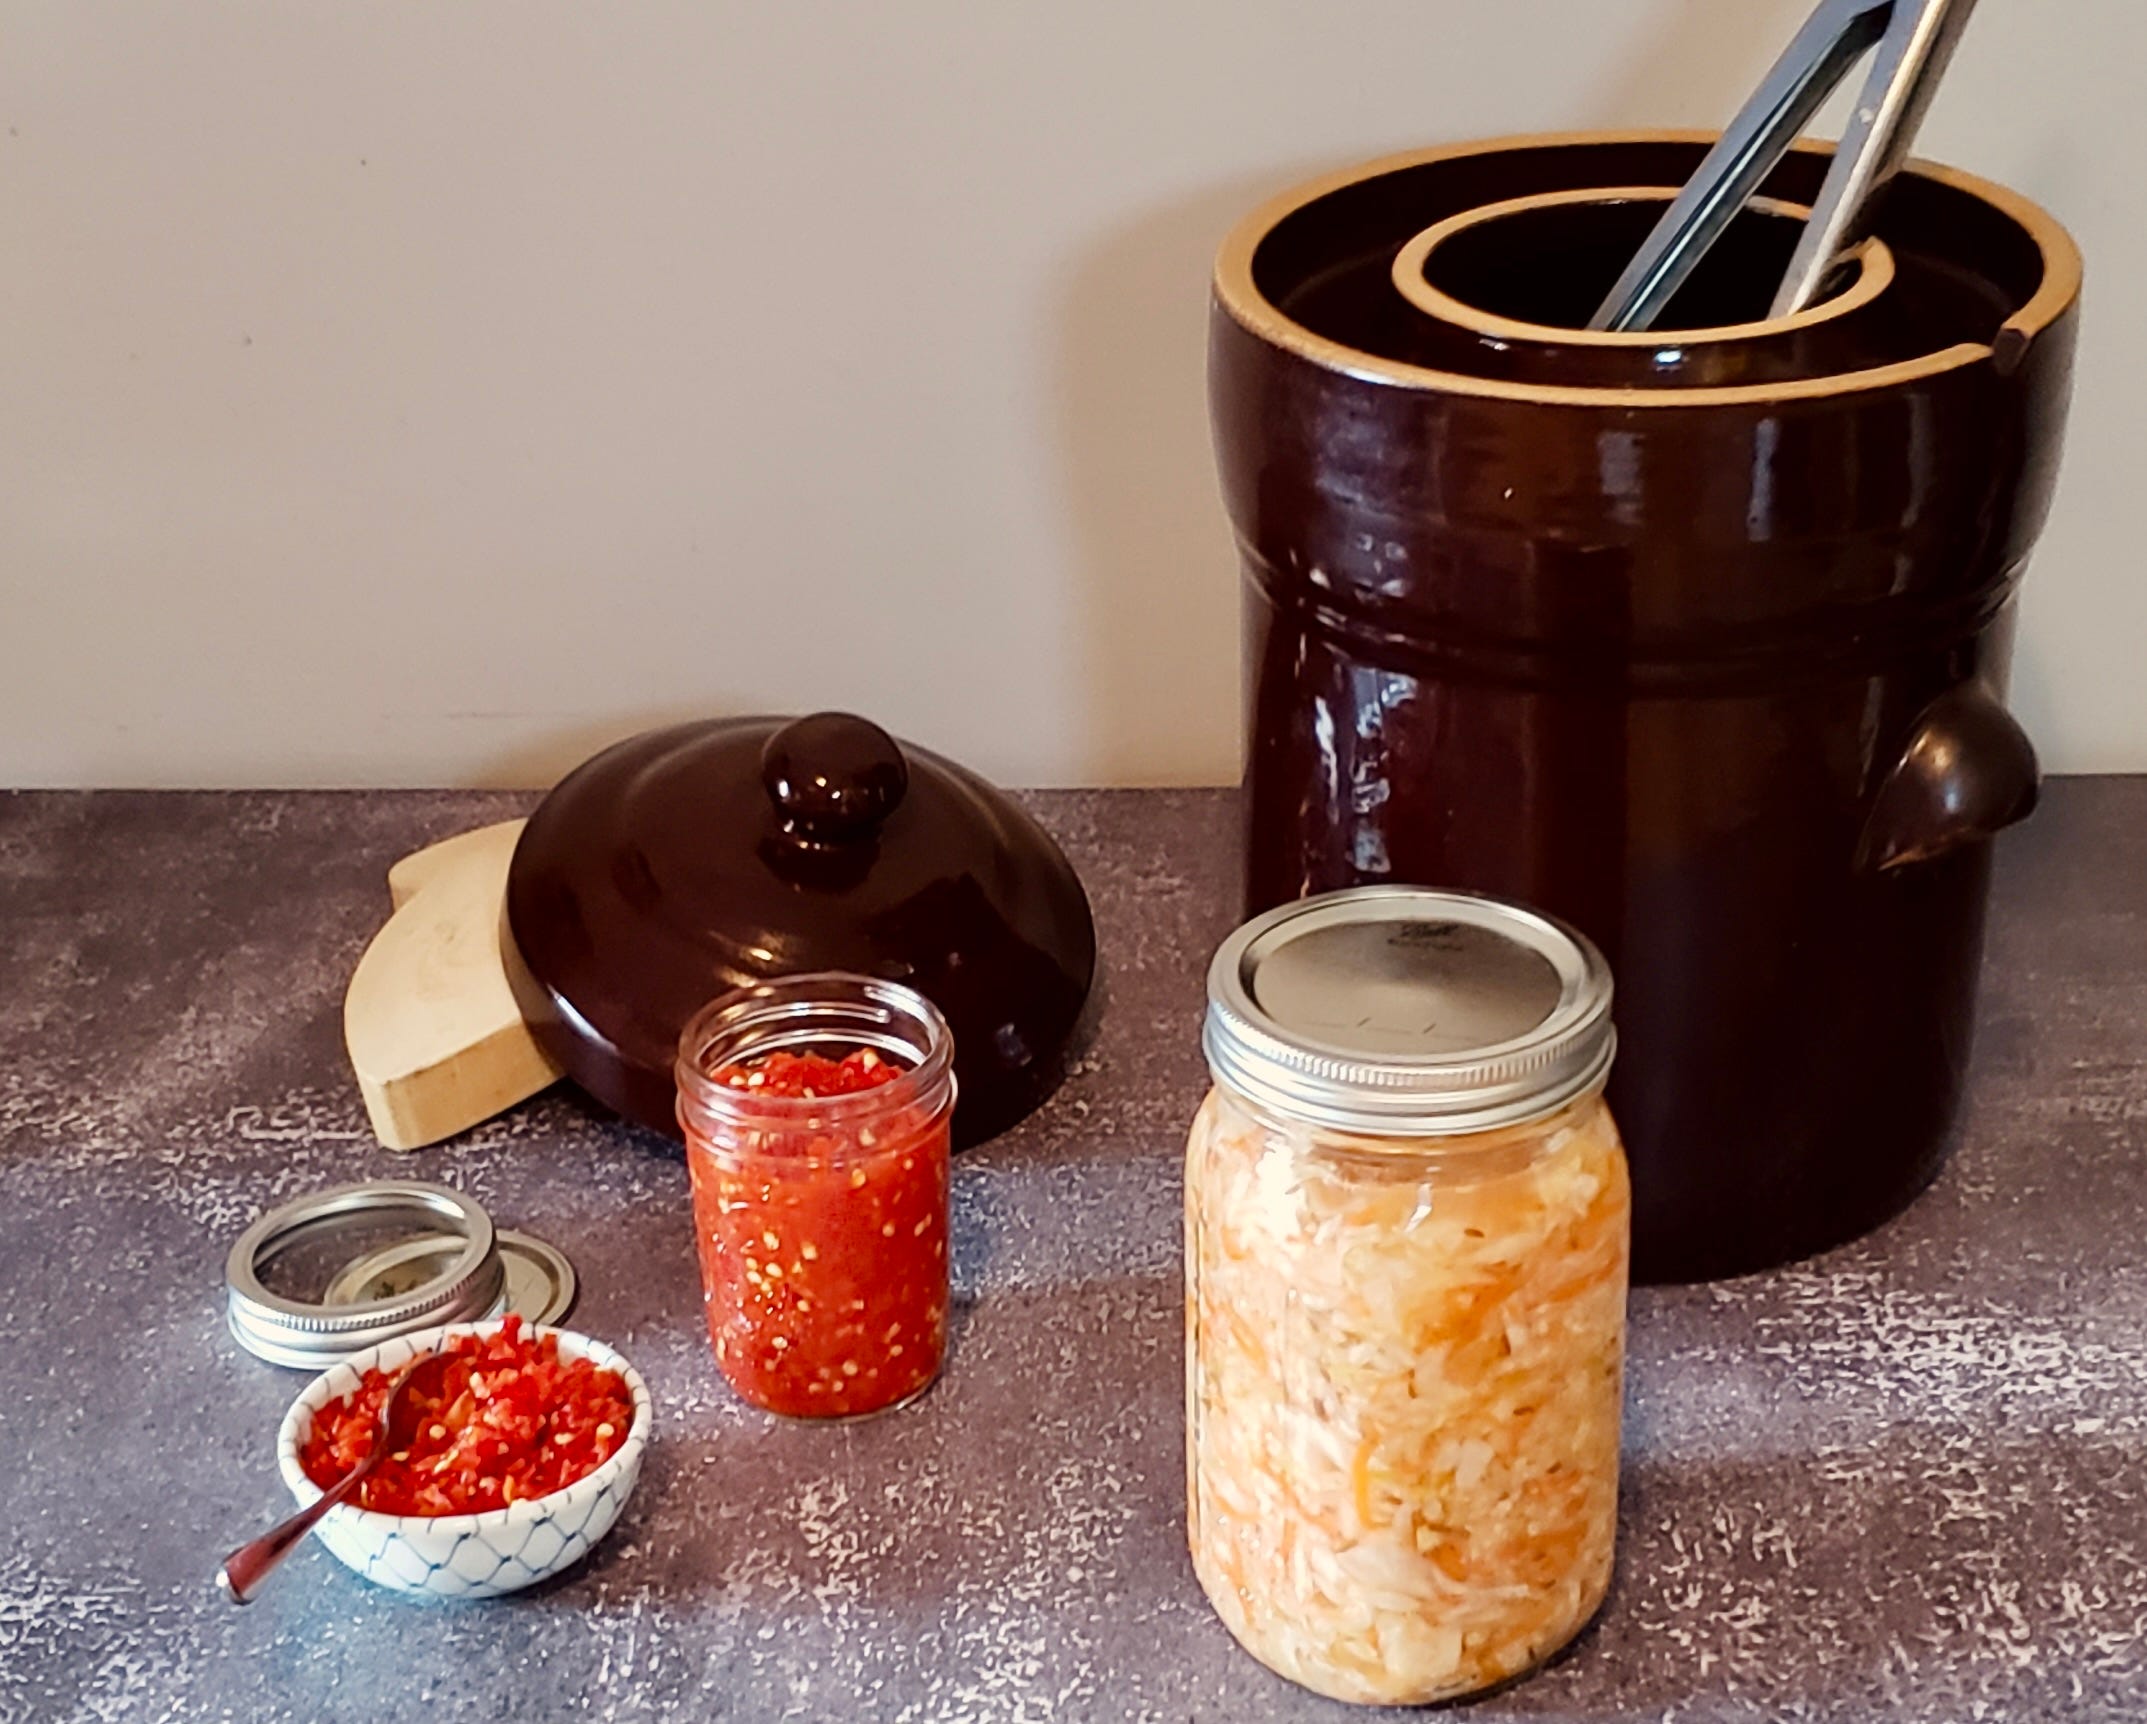
A starting point with sauerkraut and a sambal influenced chili paste

Fermenting is essentially another method of pickling. When done correctly, fermenting an item will preserve that item for longer storage, like cucumbers becoming half-sour pickles. That being said, I generally only ferment an amount that I am going to go through in a month or two, because even in the refrigerator, things can still eventually turn bad.
The method of fermentation that we will talk about is dry salting. In this method you are using salt to draw out the moisture of the vegetables to make the brine. This method is best for vegetables that are being cut or crushed. A different method is wet brining, in this instance a brine is made with salt and water and poured over vegetables, I find this is most suitable for fermenting whole vegetables, like cucumbers pickles or tomatoes.
Salt and Ratios
Use a salt that is additive free, so no iodine or caking agents. I usually use Diamond Kosher Salt or Maldon. The ratio I use is one tablespoon of salt per pound of vegetables.
In general, the amount of salt being used should equal 2-5 percent of the prepared vegetables by weight. My ratio of one tablespoon per pound of vegetables ends up being a little over two percent. The higher percentage of salt, the slower the fermentation will take place, and the less likely the wrong kind of bacteria will develop. There are recipes that go up to 10 percent salt, but often these are items that need to soak in water to draw out the excess salt before consuming
Temperature
Ideally, when fermenting the ambient temperature should be around room temperature (68-72 degrees Fahrenheit). That being said, I have made ferments in the middle of the summer without an issue, but temperature is as important as the salt percentage. In my experience, warmer temperatures will cause a faster ferment and the resulting product will be a softer texture. Colder temperatures will slow down the ferment, and too cold of temperatures will prevent fermentation from happening. This just leads to needing some creativity depending on the space, in the summer I may ferment in an interior room of my apartment with no windows, or a drafty area on the floor.
Mold and Bacteria
The goal with fermenting is to produce certain good bacteria, such as lactobacilli bacteria, and prevent other bacteria from culturing. Lactobacilli produces the lactic acid that preserves the vegetables and provides a nice tang. This bacteria also prevents other bacteria and fungi from culturing, so when done right mold and other bacteria growth should be a non-issue. Of course, this is a very simplified explanation, other bacteria that are beneficial will also culture and provide certain flavors and affect the pH levels. Some sources recommend just scooping away any bad surface growth and continuing on, however, since fermenting vegetables is usually inexpensive, I just toss the batch and start over. While this is just my experience, in 15 years I’ve only had one batch go off during fermenting that had visible mold growth.
In general, the only regularly occurring growth I have seen is kahm yeast. This appears as a white, cloudy substance on top. While not harmful, it can alter the flavor and aroma of the ferment so I scoop it off if I see it.
Containers
Traditional pickling crocks are glazed ceramic vessels, usually they come with weights that can be used to keep everything submerged. In restaurants I would use food grade plastic containers, either cambro containers or plastic bucket. For a weight to keep everything submerged I would nest a second clean container into the first with boxes of salt inside to weigh it down. Nonreactive metals pans and bowls can also be used, but I try to avoid metal for fermenting in general, mainly because I need bowls and pots for other purposes. If you do not have weights or anything to help keep the vegetables submerged, you can make a liquid brine that matches the salt percent of your mixture and pour it into a ziplock bag. In this case I always double bag it, but if both bags do end up leaking, your salt ratio will remain the same.
Time
Depending on all of the previous factors, how long it takes to ferment will vary. I have had some ferments done in 48 hours, and another time I had a batch of sauerkraut go for 4 weeks. As the bacteria does its thing, you will notice bubbling coming up through the brine. As the bubbling slows down, generally it will be a good time to check the ferment flavor-wise. Ultimately, some of this will also come down to taste, a longer ferment will generally lead to a stronger flavor. I tend to ferment until at least any bubbling activity ceases. After that, I’ll taste the ferment until it is to my liking.
For further reading on fermenting, I recommend Sandor Katz, “The Art of Fermentation” and Linda Ziedrich, “The Joy of Pickling.” When I first started pickling and fermenting, both of these books were valuable resources that I still turn to as references years later.
Sauerkraut
yields 3 quarts
5 LB Cabbage, thinly sliced (2.27 kilograms)
1 LB Carrot, peeled and shredded (454 grams)
6 TBSP Kosher Salt (55 grams)
1 TBSP Caraway Seed
To prepare the cabbage, remove any dark green outer leaves. Quarter the cabbage and remove the core. Slice each quarter lengthwise and then turn the wedges to slice across.
In a large bowl, combine the cabbage, carrot, and caraway seed.
Sprinkle the salt over and use your hands to massage the salt into the vegetables. Be sure to thoroughly work the vegetables in your hands. The goal is to bruise the cell walls of the vegetables to help the salt draw out the moisture, this will draw out the brine. Alternatively, use a meat mallet, or any other blunt instrument, to pound the mixture with the salt. The more you bruise the cabbage now, the softer your end result will be after fermenting. I personally like sauerkraut with some texture, so I give it a quick, but thorough massage.
Pack the vegetable mixture (and any liquid that has drawn out) tightly into your fermentation container. Make sure the mixture is packed as tightly as possible.
Weight the mixture down, within a few hours the brine should cover the mixture. Cover the container tightly with cheese cloth or a towel. Check every few days and if scum is forming on top, skim it off with a spoon (this is generally just a yeast and nothing to worry about it).
After bubbling has slowed down, use a clean utensil to taste the sauerkraut. If you prefer it to be more pungent, let it continue to ferment. Once the sauerkraut has reached your liking, transfer it to the refrigerator for longer storage.
Fermented Chili Paste
yields 2 cups
1 LB Red Chili Peppers, such as red finger hot or red fresno (454 grams)
2 EA Garlic Cloves
1 TBSP Kosher Salt (11 grams)
Remove the stems and rough chop the chili peppers.
Place all ingredients into a food processor and pulse until a coarse paste is formed. Alternatively, combine the garlic and peppers on a cutting board and just keep running a knife through them to get them to size before mixing with the salt.
Pack the mixture into a container, weigh it down (I use a quart container with a rocks glass as a weight for small quantities like this) to keep the chili mixture submerged in it’s brine. Cover with cheese cloth to keep any bugs out.
Check the mixture after a couple of days. If you would like it more sour go another day or two. When ready, transfer the paste and the brine into the refrigerator.
Alternatively, once the paste is fermented to your liking it can be pureed further for a fermented hot sauce.